- Essentials
- Getting Started
- Datadog
- Datadog Site
- DevSecOps
- Serverless for AWS Lambda
- Agent
- Integrations
- Containers
- Dashboards
- Monitors
- Logs
- Tracing
- Profiler
- Tags
- API
- Service Catalog
- Session Replay
- Continuous Testing
- Synthetic Monitoring
- Incident Management
- Database Monitoring
- Cloud Security Management
- Cloud SIEM
- Application Security Management
- Workflow Automation
- Learning Center
- Support
- Glossary
- Standard Attributes
- Guides
- Agent
- Integrations
- OpenTelemetry
- Developers
- Authorization
- DogStatsD
- Custom Checks
- Integrations
- Create an Agent-based Integration
- Create an API Integration
- Create a Log Pipeline
- Integration Assets Reference
- Build a Marketplace Offering
- Create a Tile
- Create an Integration Dashboard
- Create a Recommended Monitor
- Create a Cloud SIEM Detection Rule
- OAuth for Integrations
- Install Agent Integration Developer Tool
- UI Extensions
- Service Checks
- IDE Integrations
- Community
- Guides
- API
- CoScreen
- Cloudcraft
- In The App
- Dashboards
- Notebooks
- Alerting
- Infrastructure
- Metrics
- Watchdog
- Bits AI
- Service Catalog
- API Catalog
- Error Tracking
- Service Management
- Infrastructure
- Application Performance
- APM
- Continuous Profiler
- Database Monitoring
- Data Streams Monitoring
- Data Jobs Monitoring
- Digital Experience
- Real User Monitoring
- Synthetic Monitoring
- Continuous Testing
- Mobile Application Testing
- Software Delivery
- Security
- Security Overview
- Cloud SIEM
- Cloud Security Management
- Application Security Management
- Log Management
- Observability Pipelines
- Log Management
- Administration
Enable SSO with a Generic Identity Provider
Enabling Single Sign-On (SSO) in Cloudcraft allows you to simplify authentication and login access to Cloudcraft.
This article helps you set up SSO if you do not have a specific guide for your identity provider. If your identity provider is Azure AD or Okta, see the following articles:
For more general information on using SSO with Cloudcraft, check out Enable SSO in Your Account.
Setting up SAML/SSO
The SAML Enterprise SSO feature is only available for the Enterprise plan, and can only be configured by the Cloudcraft Account Owner role.
- In Cloudcraft, navigate to User > Security & SSO.
- The details you need to create a new application with Azure can be found in the Cloudcraft service provider details section.
Log in to your identity provider as an administrator.
Follow their documentation to create a new application for SAML integration.
Map their fields with Cloudcraft’s fields. For reference, the fields are usually mapped as follows, with the first one being the label used by your identity provider and the second one being the label at Cloudcraft.
- Single sign on URL: Assertion Consumer Service URL
- Audience URI: Service Provider Entity ID
- Name ID: NameId Format
If the Name ID field is a dropdown, select emailAddress or similar.
You can also include an app logo to make it easier for users to see which application they are signing in to. We have one that fit most provider's restrictions over here.
- Configure the application to allow access to all the relevant users within your organization.
- Download the metadata file generated by your provider — sometimes called federation XML.
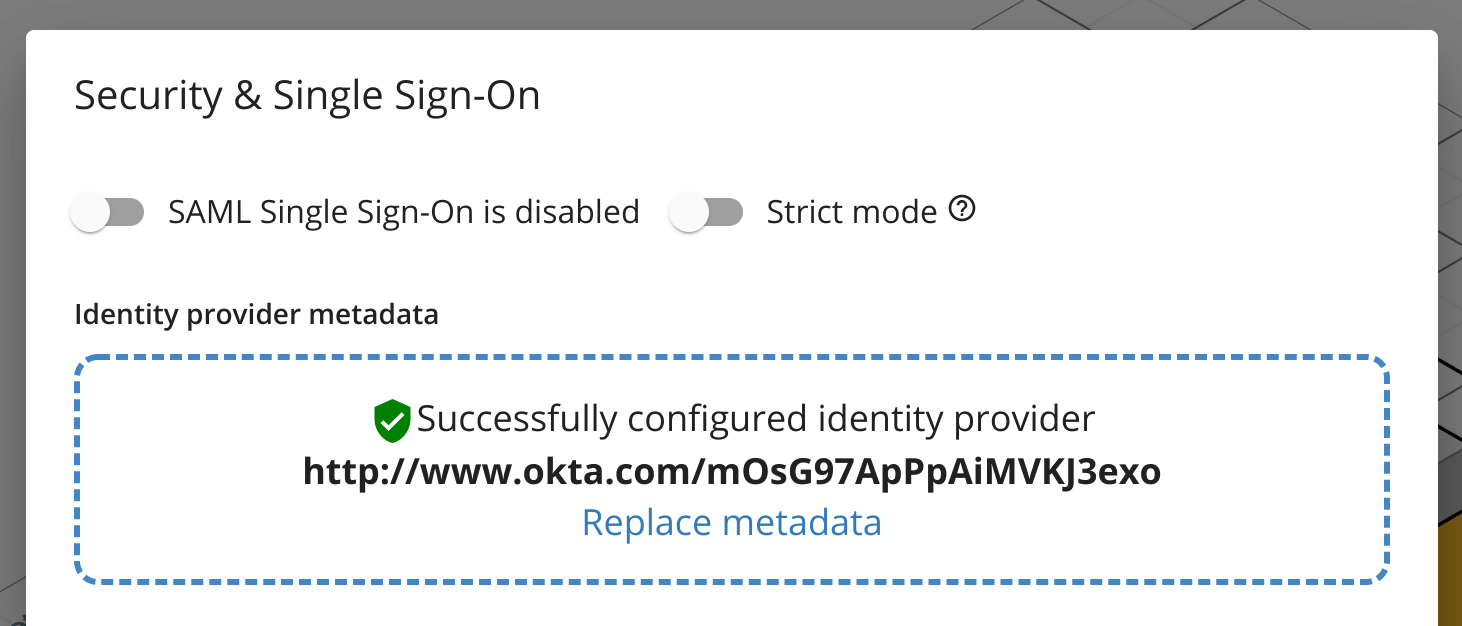
- Navigate back to Cloudcraft and upload your metadata XML file.
- Toggle the SAML Single Sign-On is enabled option.
- If you prefer to have your users access Cloudcraft only via your identity provider, enable the Strict mode option.


